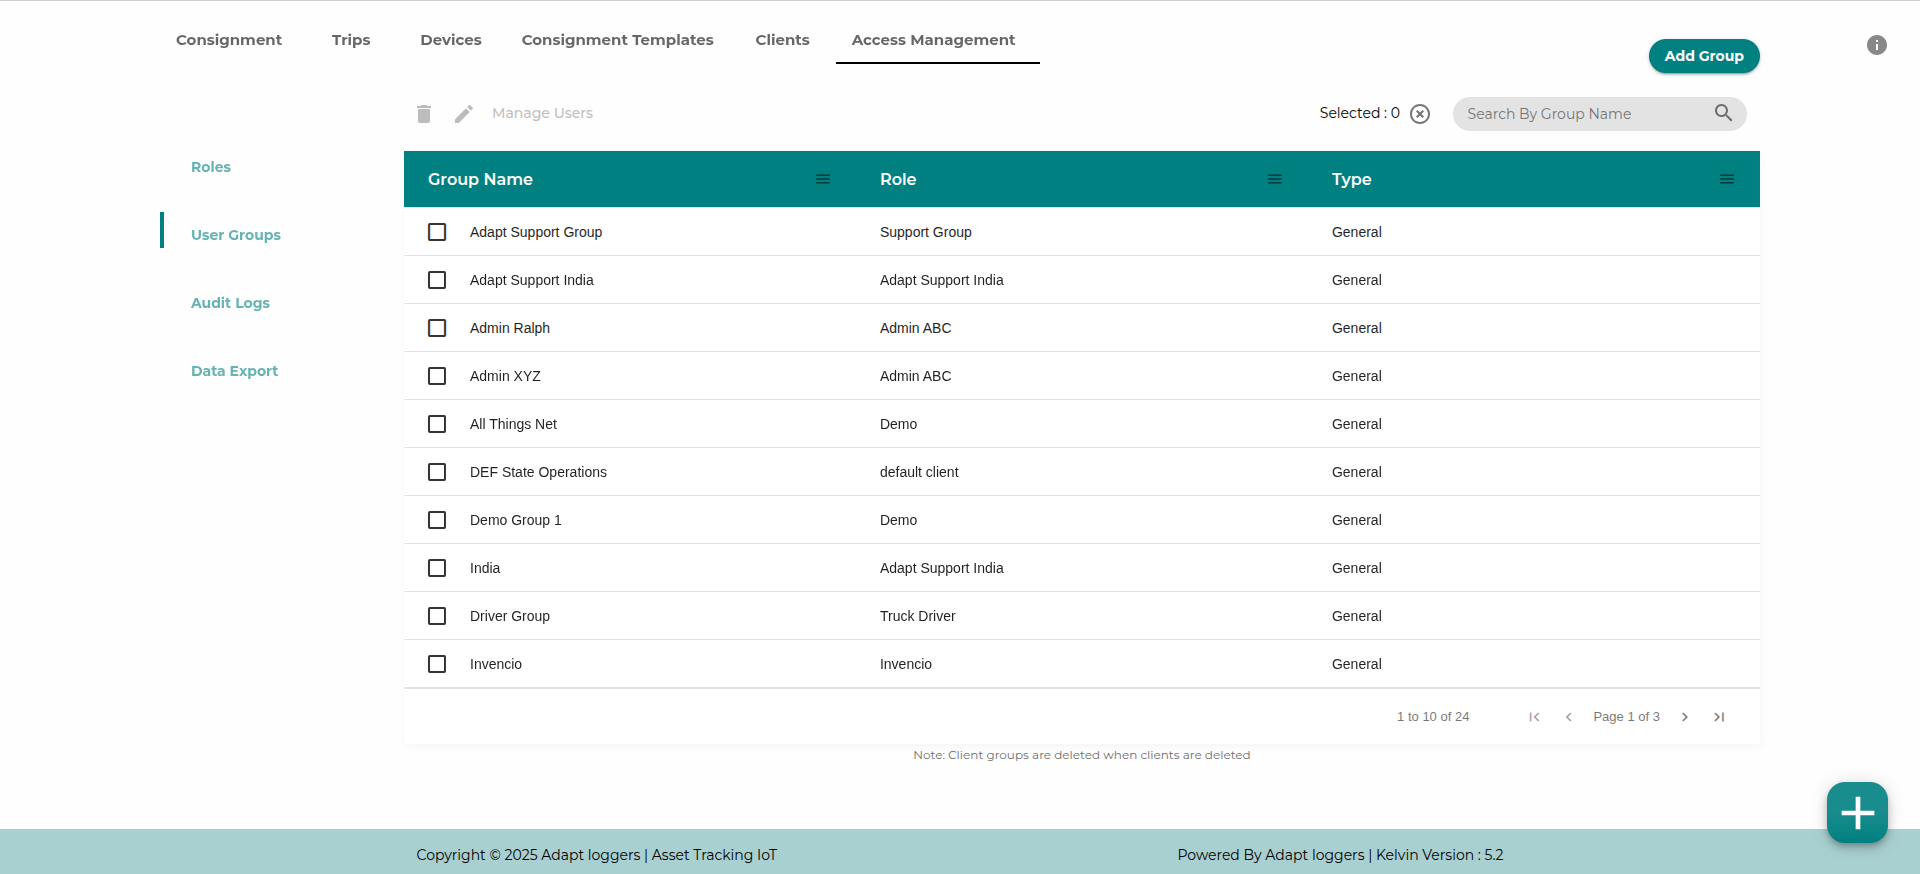
User Groups
Managing user groups#
Users in a group have the same role.
Groups are present in the Admin panel of the Control panel section.
Here is a break down of the columns present in the groups.
- Group Name
- Role - The role assigned to the group
- Type - Type of the group. It is
Generalif created fromAdd Groupbutton. AClienttype group is created when a client is created from theClientstab.
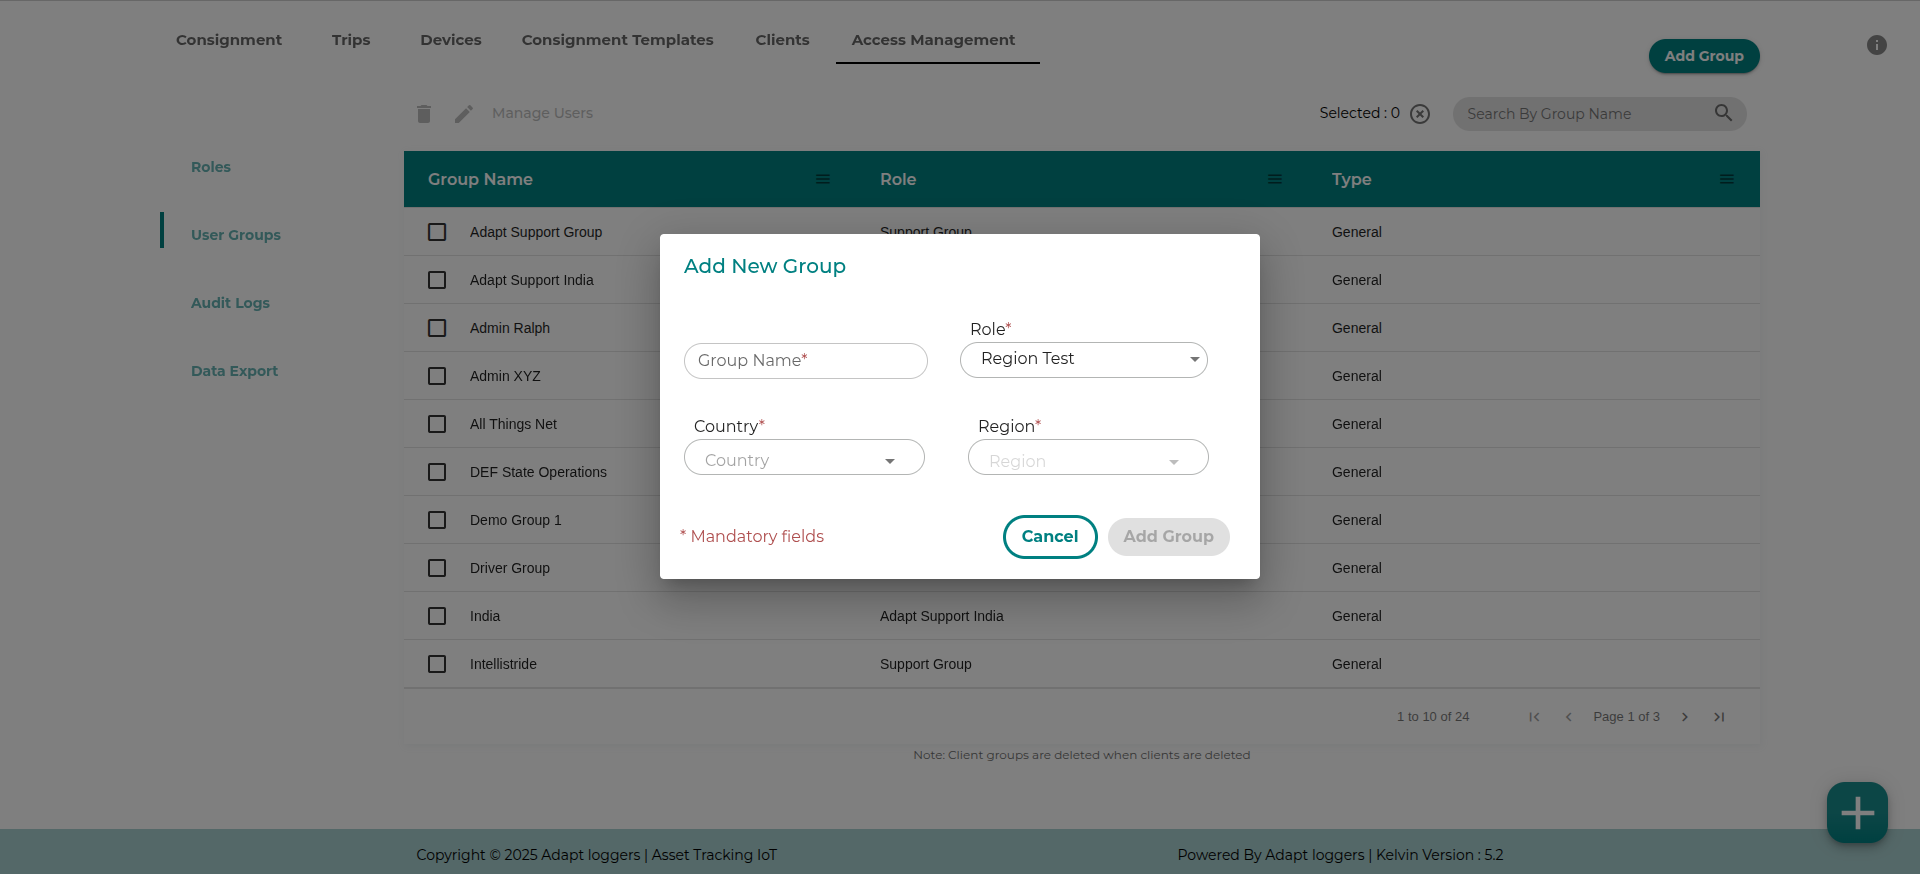
Adding a user group.#
Click on the Add Group button
note
Adding user groups requires atleast one role to be present.
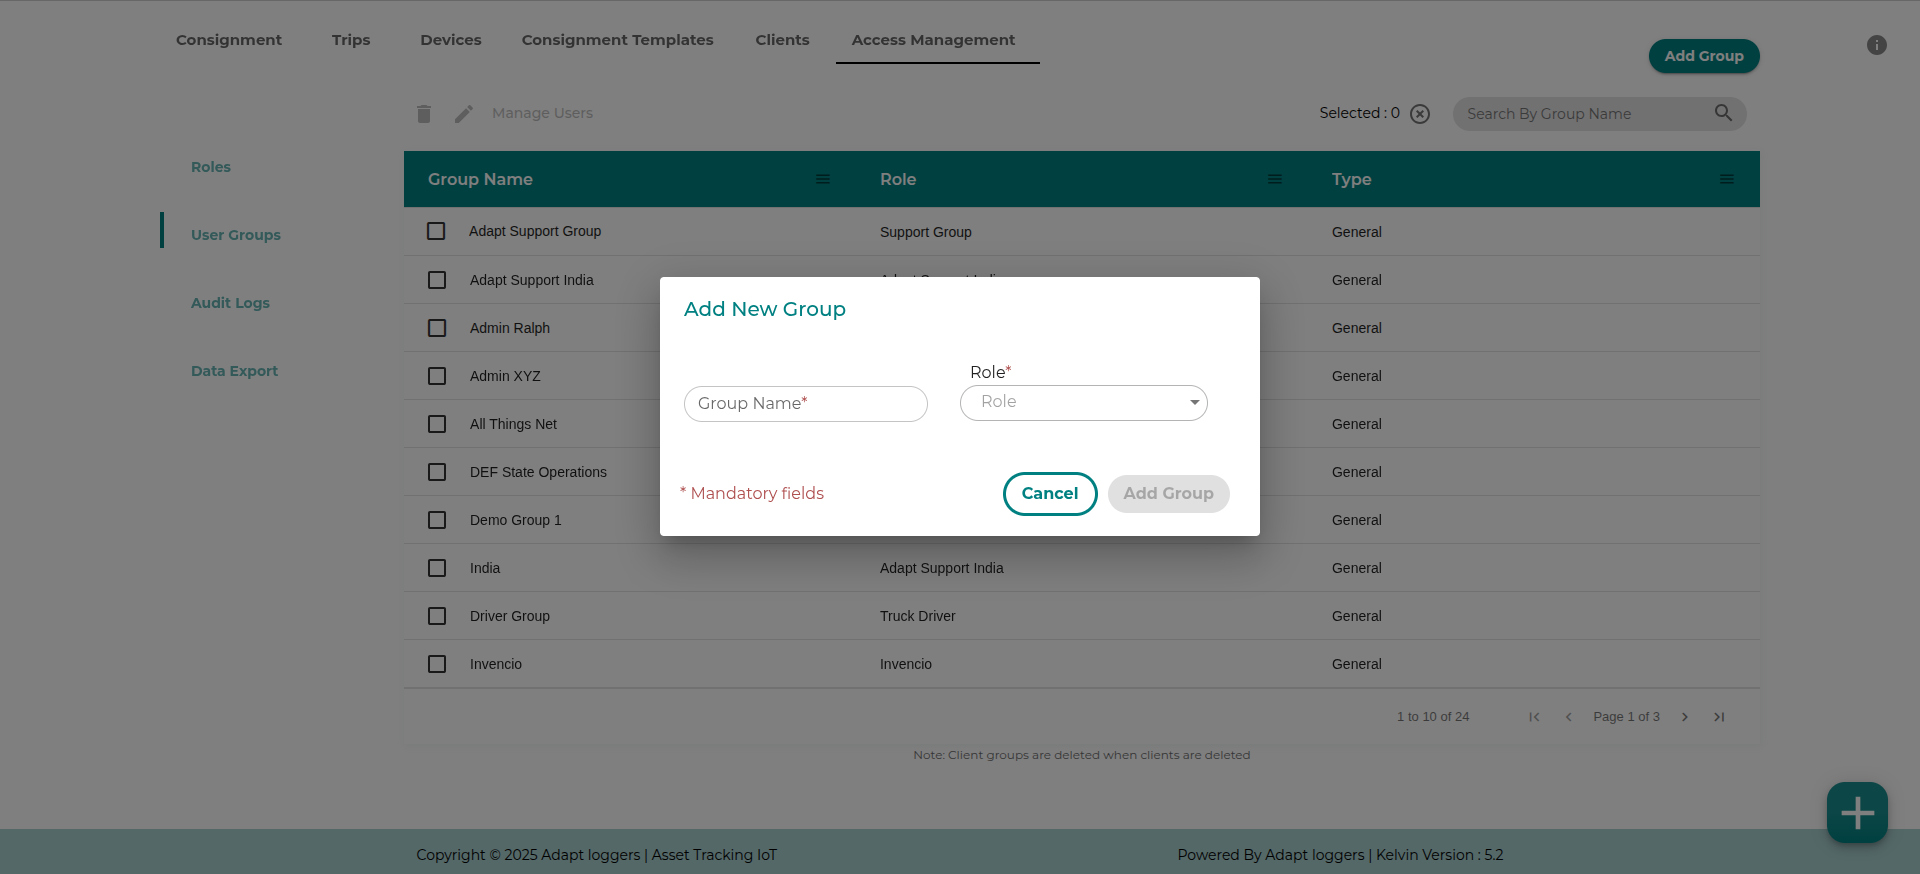
Fill in the required details:
- The name of the user group.
- The role you want to give to the user group. This role can to be either client based or region based or both. Read about roles here.
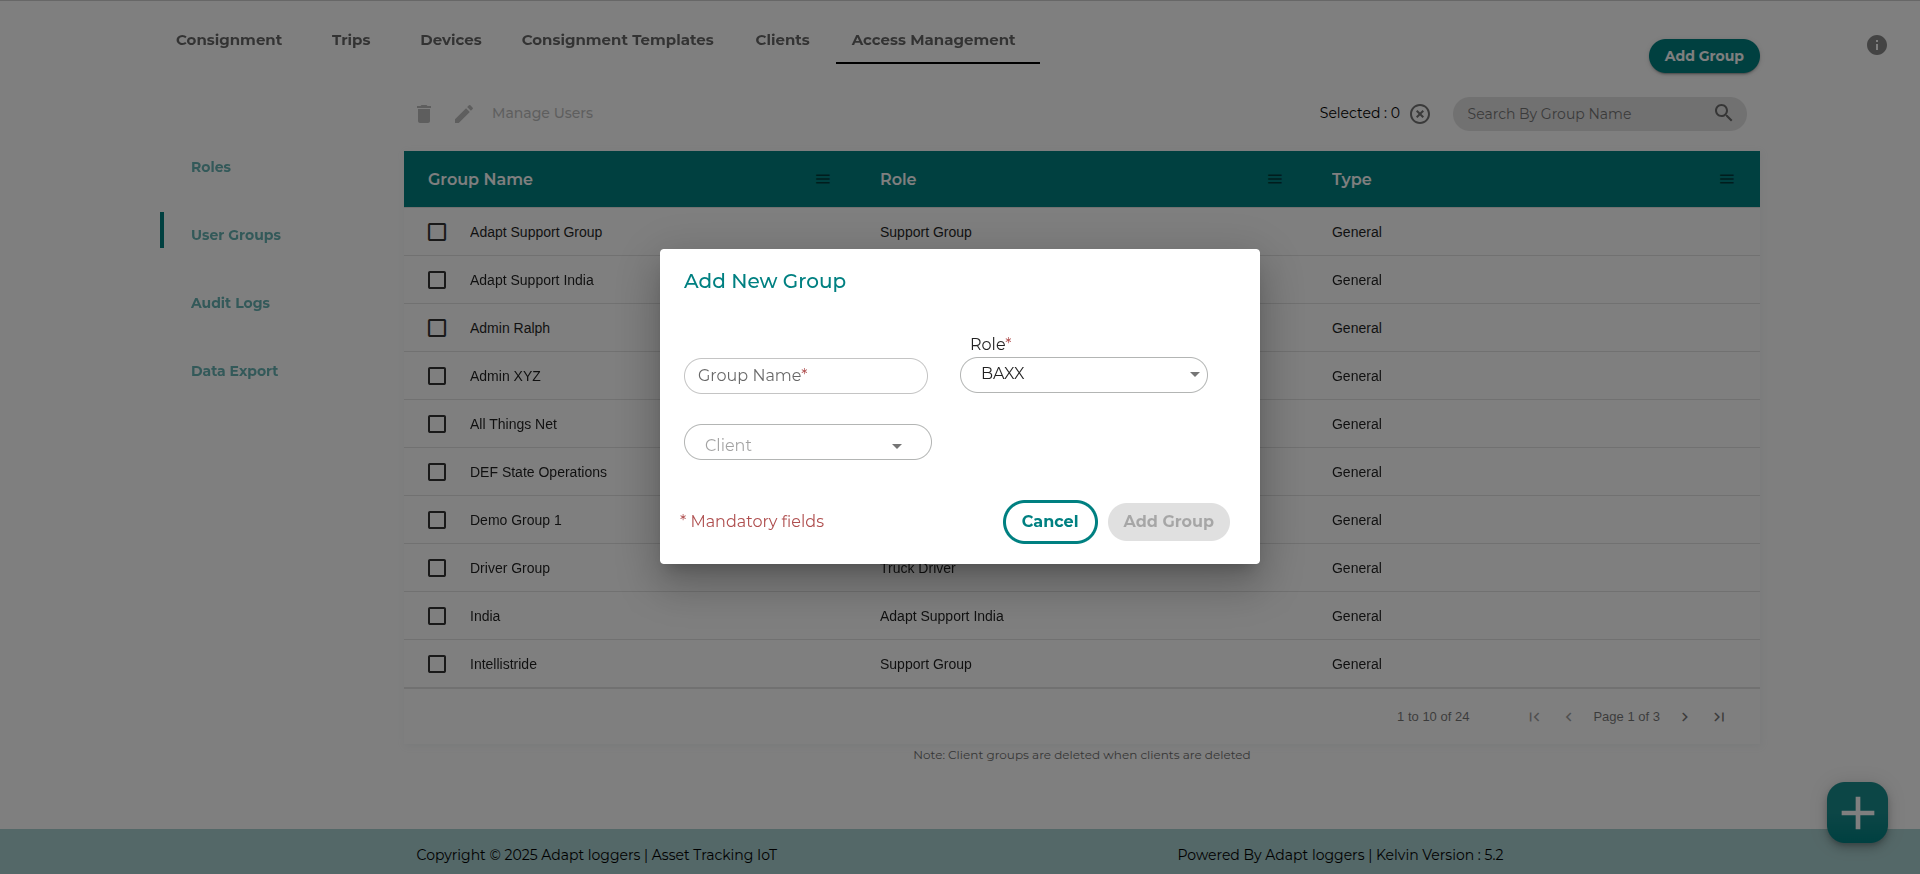
- Depending on the type of role, fill in the additional details.
- For client type role, select the client name from the dropdown. These clients are same as the clients in the clients section of the control panel. If you do not have any clients then you need to create a client so that you can create a client based user group.
- For region type role, select country and state name from the dropdown. The user group would be restricted to the particular region of selected country.
Managing users#
click on the Manage Users option to add or delete users. Click on the add User Option and fill in the Email ID for the account that is being created. You will then have to assign the user role according to the user rights. There are two levels of users in a group:
- Admin
- User
An admin user of a group can manage the users in the group. They can add/remove users from the group and also decide who should get notifications for the consignments in that group.
click on the + button inorder to add the user. Once the user is added, click on the Manage Users option again and enable SMS and/or email for notifications
User will receive an email asking for Updating your password with a link to facilitate that. The link is Valid for 24 Hours after which you will have to reach out to the IT department for a temporary password.
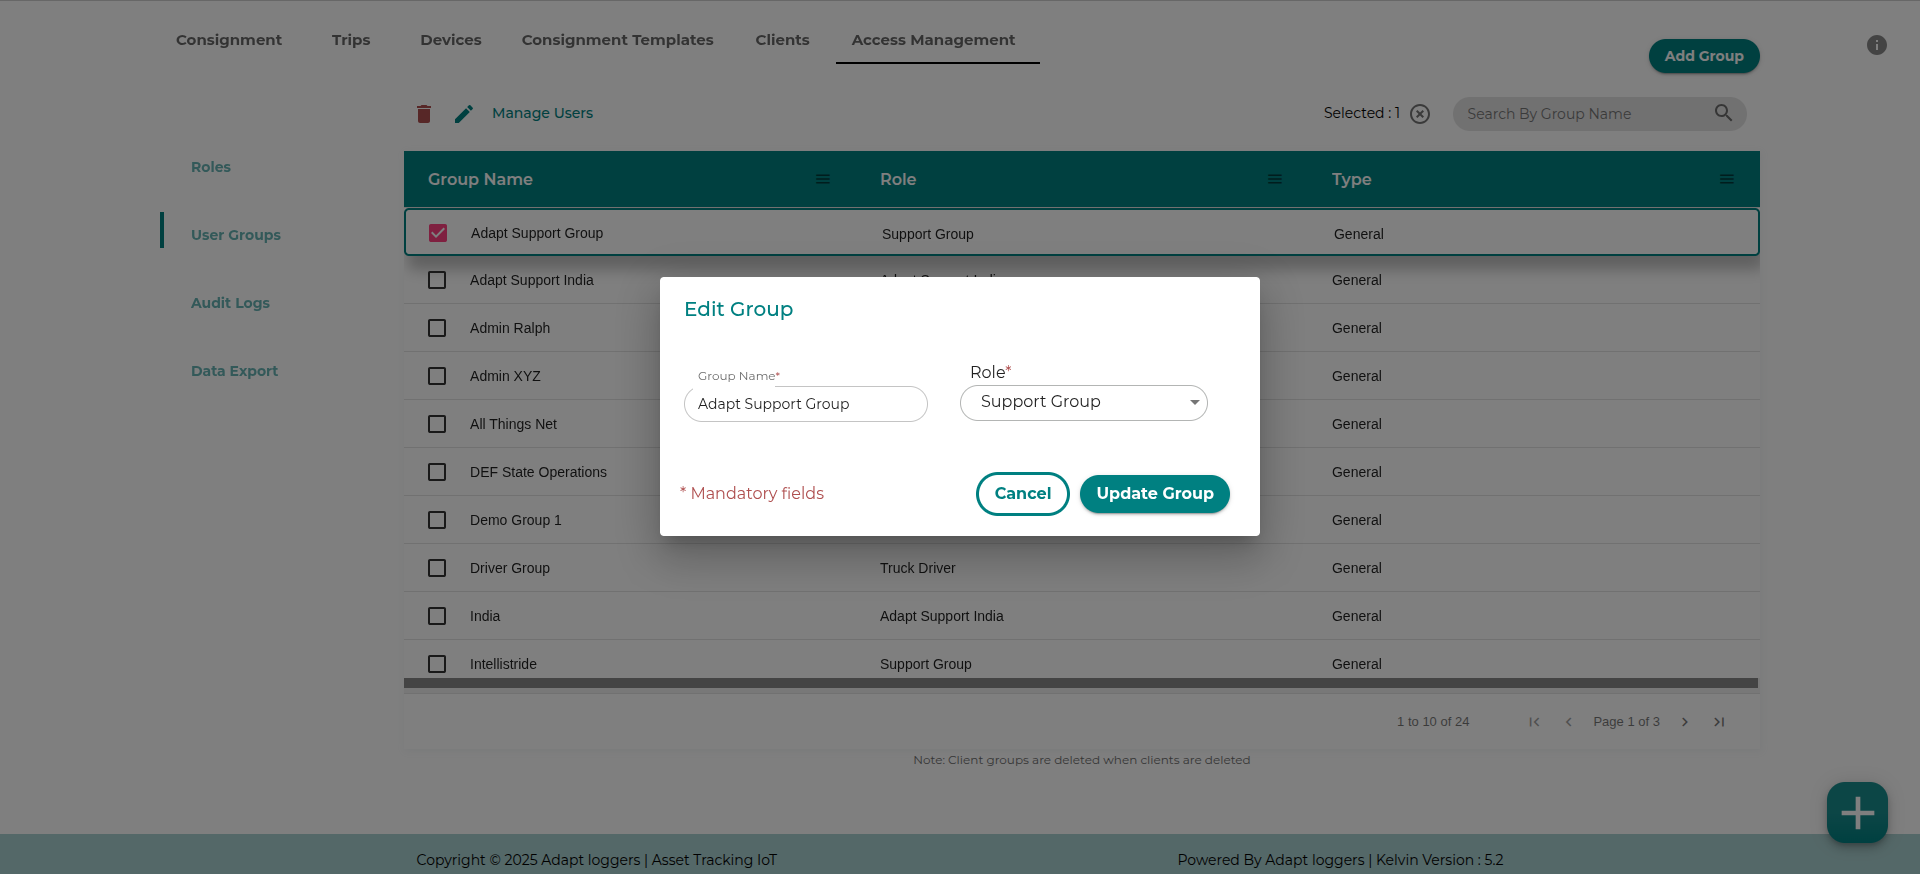
Edit Groups#
You can reassign a role to a group or rename. Click on the group you want to edit and click on the Edit button.
Edit dialog shows up, prefilled with the groups information. Edit the group name, role and type.
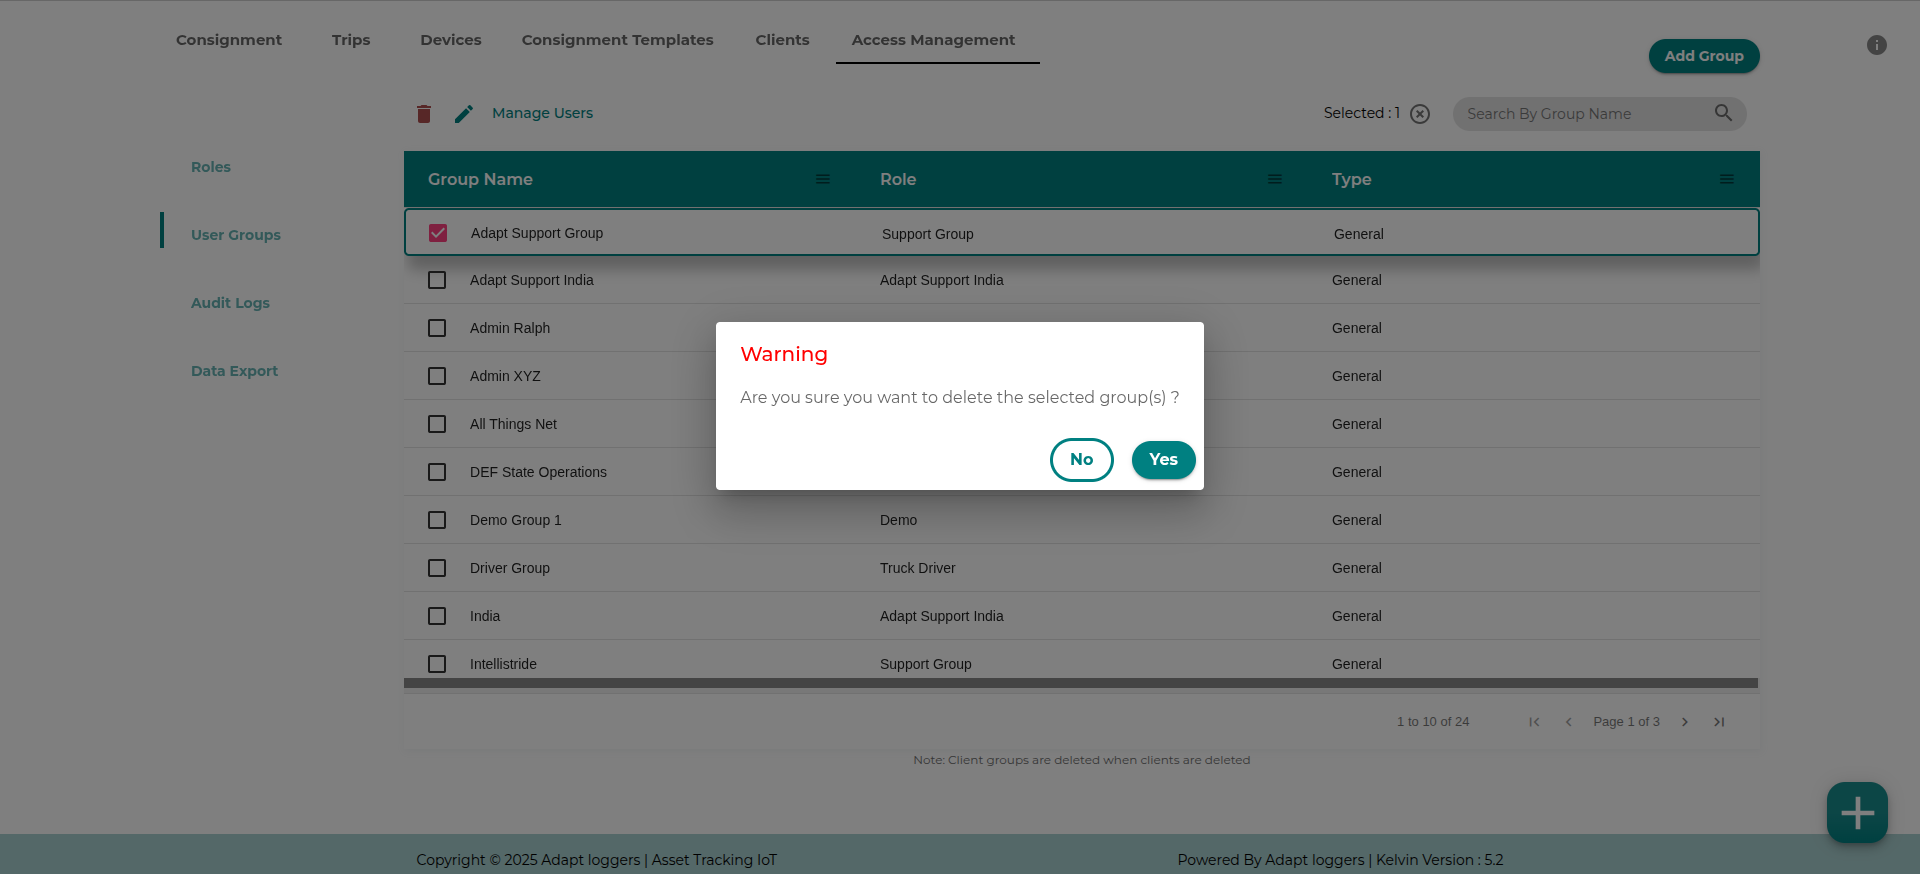
Delete Groups#
To delete a group select the group you want to delete and click on the Delete button. A confirmation dialog opens up. Click yes to delete the group.